Wednesday, February 20, 2013

Any Resemblence To The Original Pattern

is completely coincidental and entirely unintended. Or something like that...


I've had this pattern in my stash for a few years. I liked the size--8" x 9"-- and the cross body strap. But there were no zippers, and I like to keep my valuable stuff secure. I mean, who wants her Chapstick falling out of her purse? I also prefer a more inconspicuous purse for traveling.

I used a black corded polyester. I stabilized the fabric with black French Fuse. I like this fabric, and I think it would make a nice pair of tailored slacks for those who wear polyester. At $3.97 per yard and 60 inches wide, it would be worth a try.

Here's the front of the purse. Instead of velcro, I used a loop and a covered button as a closure. If you look carefully, you can see that I have added a gusset around the sides to add more volume to the body of the purse.


Here's the front with the flap open. I put a zipper pocket on the inside of the flap. Instead of the pattern's one large pocket on the front, I put two flat pockets on the front. The pockets will hold phone and sunglasses, and the closed flap will keep them in place. I also added a key hook inside one pocket. You can see the zippered gusset at the top.


I put a zipper pocket on the back. This pocket will keep my coupons for 40% off at the fabric store right where I can find them.


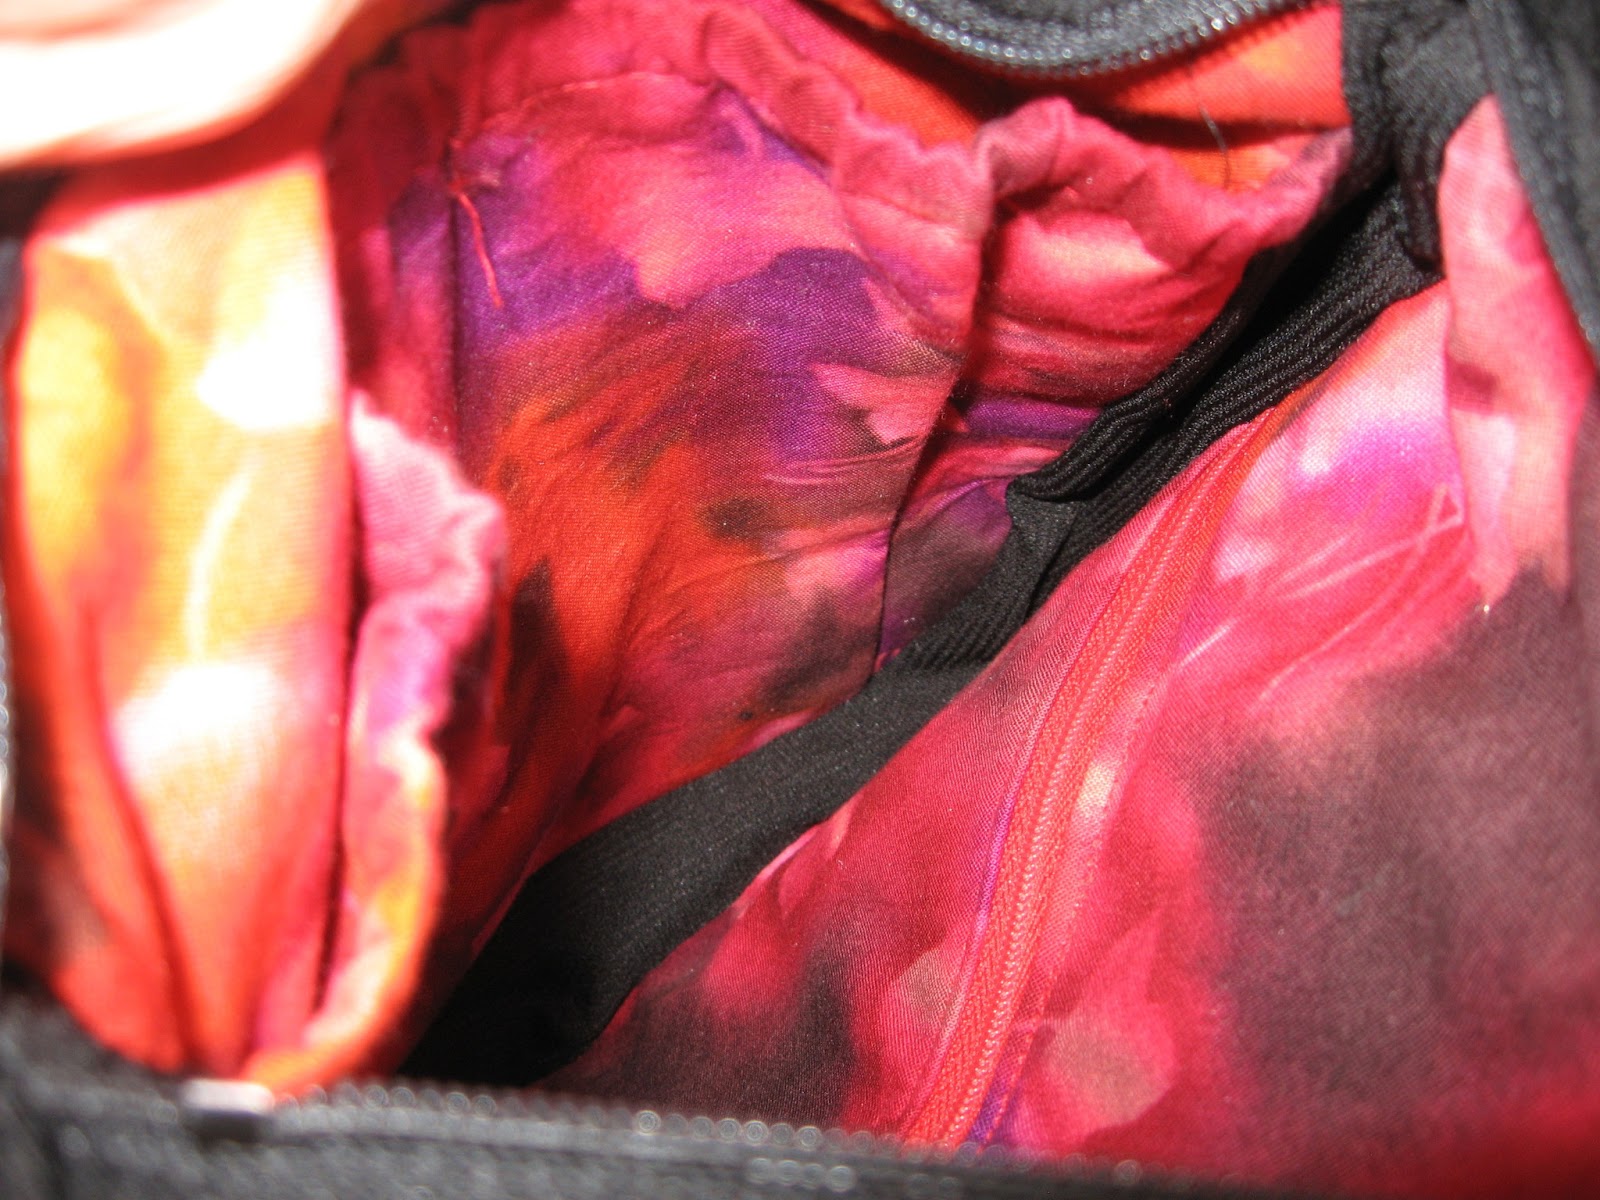
And here's the lining. Originally I planned to use the outer fabric for the lining. But I wanted to put a zipper pocket inside, and I'd run out of black zippers. So I looked for a zipper I'd be unlikely to use for anything else. I found a 24" red zipper, and then I found some red print quilting cotton to match the zipper. I interfaced the lining with a crisp fusible. I also put the pocket intended for the front of the purse on the inside. It is a couple of inches wider than the purse and the top is elasticized.


As with most of these projects, the engineering was the most interesting part. I wanted no unfinished seams exposed. In order to attach the lining to the top gusset, I needed a brief consultation with Dr. Mathematics. So now I know quite a bit more about closed cylinders.

Friday, February 8, 2013

Second Sewing Of The New Year


My second sewing project of the new year was another tailored wool jacket. I finished it in January. The fabric is an olive green wool twill from the depths of the cedar chest. There are tiny bits of tan and rust in the twill. They're not visible from a distance, but they give the fabric some depth. I think this kind of very pronounced twill is called cavalry twill. I ignored the part of the pattern that said, "Not suitable for obvious diagonals."

As with the gray jacket below, alterations were the major work of this project. There is not a single piece in this jacket that is made from the original pattern. That includes things such as the collar and the collar stand. I made two non-fitting changes to the pattern. First, I decided that the collar was too large for a short person so I decreased the depth of the collar. I did this by making a 1/4 inch fold lengthwise in the collar pattern. Then I straightened the cutting line from the neck edge to the collar point. If I had just cut off 1/4 inch from the outer edge of the collar, the collar point would have been farther from the lapel edge. The other thing I did was to change the way the undercollar was cut. The pattern called for it to be cut in one piece on the bias. To keep the bias direction the same at both collar points, I cut the under collar in two pieces, with a seam at the center back. I cut the interfacing for the undercollar the same way.

The front, undercollar and collar stand were interfaced with fusible Armo Weft. All the other pieced were underlined with French Fuse. The back stay is poly cotton. The shoulder pads are four layers of poly fleece and the sleeve heads are lamb's wool. As with the gray jacket, the roll line was not marked. So I had to make my own. It is taped with twill tape.

This pattern called for a sort of crescent moon-shaped collar stand that went from one roll line around the back to the other roll line. It does not show at all. The pattern called for the upper (inner) side (toward the body) to be interfaced. That did not make sense to me. The under (outer) collar stand is the part that holds up the collar and keeps it from collapsing onto the jacket back as the collar is folded back. So I interfaced the under (outer) part of the collar stand.

The pattern also called for the darts to be topstitched. Since I didn't want to emphasize them, I omitted the topstitching.

The jacket was lined with a poly charmeuse. The pattern and color look nice with the wool, but that stuff was nasty ugly frustrating not as nice to sew with as the wool. I've been spoiled by the wool.

Here is the pattern. It's from 1998.


Look at the tall, thin models. I do not look like that. But I think my photographer was kneeling down so the lower part of my body looks a little larger than it does when I look in the mirror. After all, my eyes are higher than the, er, lower part of my body.

Monday, February 4, 2013

Celebrating The New Year--January BJP


I felt like celebrating the new year so I chose some bright, sparkly beads. The piece started with a Miyuki Bead Soup mix called Metallic Gold Iris. There are about nine different kinds of beads in this mix. I added some other beads for texture, finish and color variety. In person, it looks somewhat more gold than the photo.

Technical Details:


The foundation is Lacy's Stiff Stuff painted with a mixture of yellow, brown and red Dye-na-Flow. Look at the edges. It turned out kind of orange after it dried, Not what I was expecting.

In addition to the bead soup mix, this piece contains 15/0s, 11/0s, 8/0s, Delicas, triangles, bugles and two larger round beads. Including the bead soup, there are at least 27 kinds of beads in this piece.

I used the backstitch and the stop stitch.

The piece is 2.5 inches by 3.5 inches.

I used gold Nymo thread.

What I Was Thinking:

I really enjoyed working on this piece. I liked the way the subtle differences in color and size made the pattern. I even liked the way the orange background looked against the beads. Because I enjoyed beading this so much, it really was a celebration journal. I was determined to finish this by January 31, and I did. Hurray for me!

Issues That Came Up:

Electronic disaster: Did you hear that loud crashing noise? It was the hard drive. Fortunately, a kindly younger relative had given Dr. Mathematics her old computer, which was significantly newer than mine. That one, too, had a crashed hard drive. But not to worry. While our Christmas chef and I went off to the butcher, Dr. Mathematics went to the computer store and bought a new hard drive. And then Dr. Mathematics went about playing with his new computer. When my computer crashed, I became the operator of the "new" computer. We were able to call in Dr. Electronico (amazingly similar to Dr. Mathematics but wears a different superhero costume) to recover all the important bits and pieces from the busted computer. This is a Linux/Ubuntu computer instead of Windows, and there's been a bit of a learning curve.

Electronic distraction: I have a new iPod Touch. I love that little device, but I spend way, way too much time playing with it instead of beading. Or reading. Or vacuuming. Honest to goodness, how can I spend so much time surfing around sewing sites and blogs? In my defense, there are many, many interesting and educational sewing sites. And don't get me started on Pattern Review. My goal for February is to go to it only once a day.